Registering a Domain Name and Using CloudFlare for DNS resolution. – Tutorial

Registering the domain

First things first, I decided that this time I wouldn’t use the .wordpress.com domain names, I wanted my own domain.
Since I’m based on Argentina I used nic.ar to register de domain.
It costed AR$ 270 (About US$ 3).

If you need to check how to register a domain in Argentina follow this link.
You can also use other DNS registrars as GoDaddy or Amazon Route 53.

Public DNS Configuration – Cloudflare

In my case registering the domain in NIC.AR does not grant DNS resolution.
GoDaddy or Amazon Route 53 DO grant domain resolution, but are more expensive.

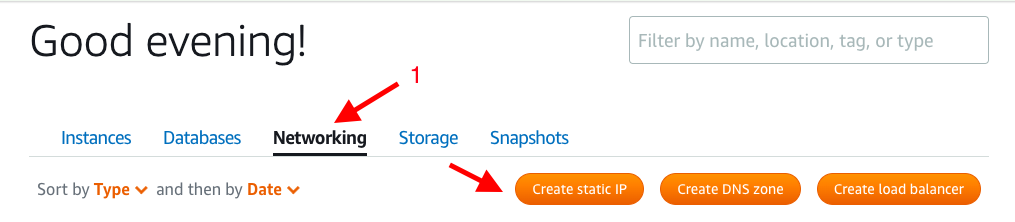
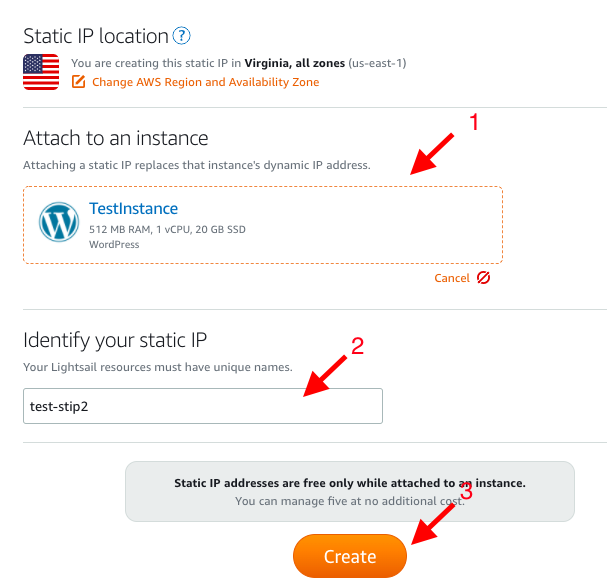
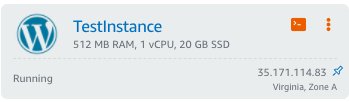
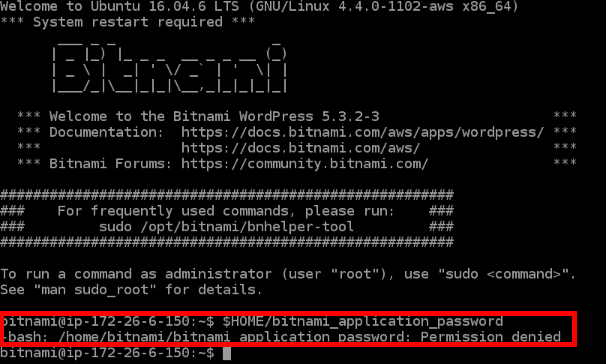
Note: To complete this steps you will need a Static Public IP address, you can see how I configured one on an AWS instance here.


For DNS resolution I decided to use Cloudflare. Since it is free for blogs and it’s configuration process is really straightforward.

  1. First, you will need to create an account, it’s completely free for blogs.
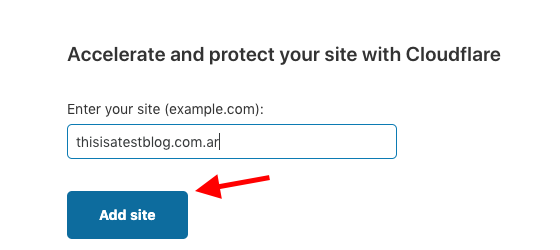
  2. Under your Cloudflare Dashboard you will have the option to add a new site.
    Note: the domains i’ve used are purely fictional since I do not own another domain.
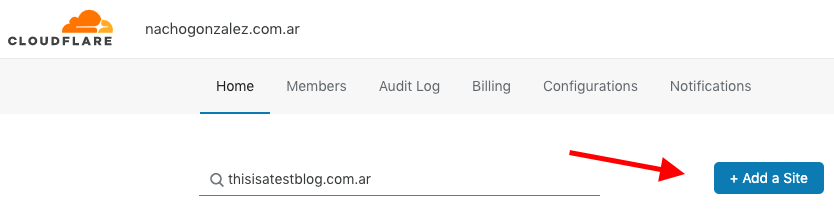

    Click + Add a Site
  3. Once Cloudflare detects the site you can click add site.
  4. We must select the plan we are going to use, the free is the best option for blogs.

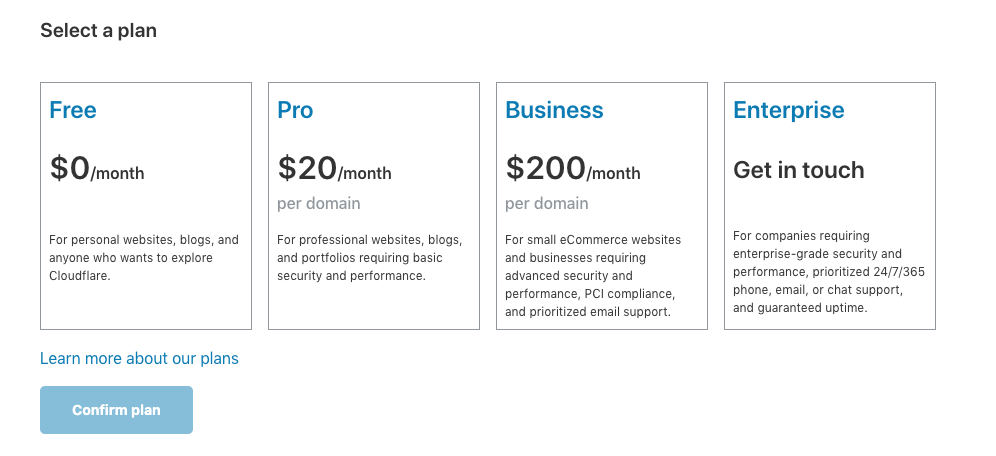
    We select the free plan and click confirm plan.
  5. Once we have completed that, CloudFlare will scan the DNS configuration of our servers and let us know the recommended actions.

    Click Continue.
  6. After that, comes the tricky part because it changes in every environment.

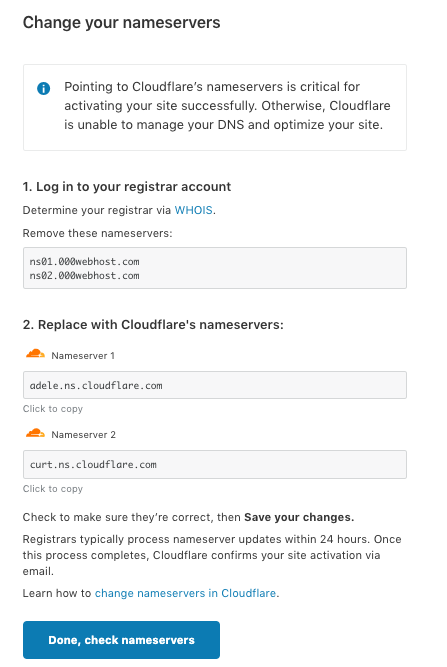
    You will need to log in to your DNS Registrar and delegate CloudFlare DNS servers as the name servers for your domain.
    Here is how to do it on nic.ar
    Once the DNS delegation is completed click Done, check nameservers.
  7. Since you have done everything properly you will be directed to cloudflare dashboard.
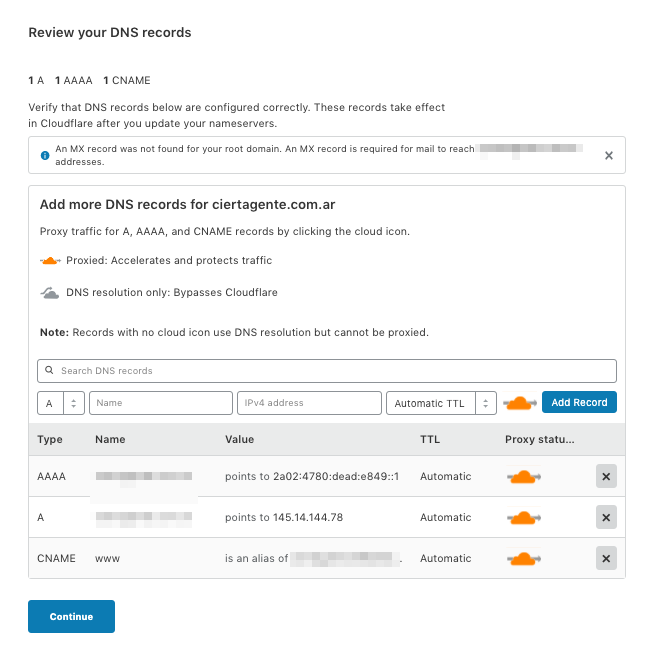
    And you will be able to create the DNS records for your domain:
    it should be something like this:
    Note: For security reasons I have censored IP addresses and some confidential parts of the screenshot.
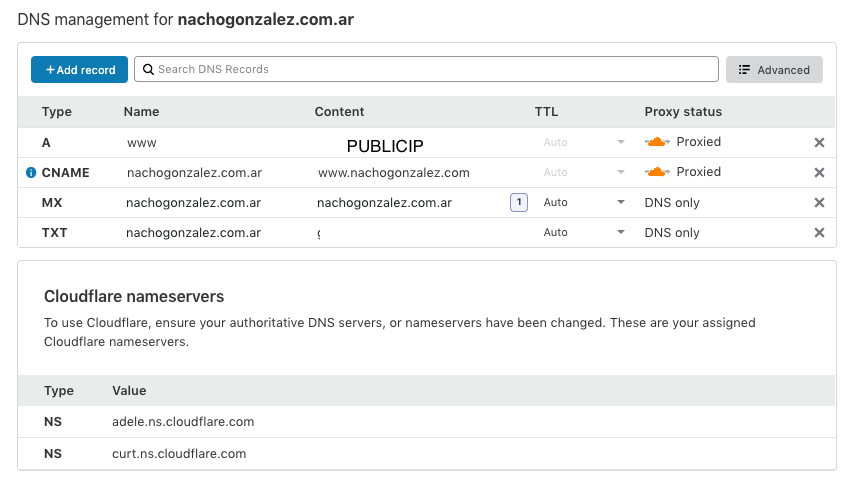
    You should create:
    – An A record called www pointing to your public IP address.
    – A CNAME record called as your domain pointing to your server’s FQDN. Check above for reference.
    – A MX record called as your domain poiting to your domain.
  8. Once all the records are completed submit the changes and wait about 15/30 mintues for DNS to be updated.
    After that name resolution should be workig for the site.

How to create a WordPress blog using AWS Lightsail? – Tutorial

Hey, it’s me again.
I wanted to write something technical today, and I figured out why not tell you how I created the blog.

Creating the server

I decided to use Amazon Web Services as my VPS provider.
Using AWS Lightsail you have a free month trial and the small instance which is really fine for a blog costs only US$ 3.50 a month for 1 vCPU, 512 MB RAM and 20 GB SSD Storage.


  1. Log in to AWS Lightsail and create an account if you don’t have one. (Requires credit card)
  2. Once you have created your account and are logged in to lightsail is time for creating the instance. Click create instance.
  3. Then we will have to select the settings of the VM we are creating:

    Select Linux/Unix as the platform and WordPress as the App+OS
  4. After that we will have to select the Instance Plan

    By default there is a 512 MB RAM, 1 vCPU and 20GB SSD VM selected, we will keep that option for this tutorial.
  5. We will set an instance name and create the instance.
    In this case I have named my instance TestInstance
  6. Then we will create a Public IP for the server.
    We will click Networking and click create Static IP.
  7. Then we will need to attach the Static IP to an instance.
    As you can see I have attached TestInstance and named the Static IP test-stip2.
    Then I have clicked create.
  8. We have successfully created our WordPress server.

    Now we’ll have to make some extra configurations. But before that, let’s make sure the instance is working.
  9. Check the instance is working:
    On your preferred browser type https://$INSTANCEIPADDRESS/wp-admin
    In my case https://35.171.114.83/wp-admin


Getting WordPress password

To get the password that will grant us access to WordPress we will need to do the following:

  1. Launch VM console
  2. Once the console is open you will need to run this command:
    $HOME/bitnami_application_password
  3. You might get the following error:
    -bash: /home/bitnami/bitnami_application_password: Permission denied

  4. In that case what we will need to do is:
    chmod +755 bitnami_application_password
    We will still get an error, but the error code will have the password output.

    Make sure to copy that password somewhere safe.
  5. Check if the password works
  6. If the password works you will be redirected to the WordPress Admin dashboard.


Congratulations, you have a working wordpress site! Configure it as you like.

Now we have to configure name resolution for the public, I’ll show you how to here.

Cambiar los certificados en vCloud Director – Tutorial

Hola! La idea de este post es aprender a cambiar los certificados en las celdas de vCloud Director.

Nota:
Cada vez que veas $PASSWORD significa que es una password a reemplazar


Pre-Requisitos

  • Acceso root a las celdas de vCloud
  • Nuevos certificados en formato .PEM
  • Snapshot de la/s celdas de vCloud

Pasos a Seguir

  1. Iniciar sesión con el usuario root a la celda de vCloud en la que vamos a trabajar.
  2. Cambiar al directorio de binarios de vCloud Director
    cd /opt/vmware/vcloud-director/bin/
  3. Obtener el estado de la celda
    ./cell-management-tool -u administrator -p $PASSWORD cell –status
  4. Detener el servicio VCD
    service vmware-vcd stop
  5. Copiar via Winscp los nuevos certificados a la carpeta /tmp/certs
  6. Cambiar el directorio a /tmp/certs
    cd /tmp/certs
  7. Unificar los dos certificados en el archivo “wildcard.pem”
    cat mycert.crt mycert.key > wildcard.pem
    Nota: vCloud director es un producto basado en Linux, por lo que es case sensitive, respetar las mayúsculas y minusulas
  8. Con la herramienta openssl exportar los certificados del archivo .pem a archivos .p12 y definir la función de cada certificado (“http” o “consoleproxy”)
    openssl pkcs12 -export -in wildcard.pem -out wildcard-http.p12 -name http

    openssl pkcs12 -export -in wildcard.pem -out wildcard-console.p12 -name consoleproxy
  9. Realizar un backup de los certificados originales
    cp /opt/vmware/vcloud-director/jre/bin/wildcard-console.p12 wildcard-console.p12-backup

    cp /opt/vmware/vcloud-director/jre/bin/wildcard-http.p12 wildcard-http.p12-backup
  10. Borrar los certificados originales
    rm /opt/vmware/vcloud-director/jre/bin/wildcard-http.p12

    rm /opt/vmware/vcloud-director/jre/bin/wildcard-console.p12

Cambiar los certificados

  1. Copiar todos los archivos con formato “.p12” a la carpeta con los certificados
    cp *.p12 /opt/vmware/vcloud-director/jre/bin/
  2. Dirigirse a la carpeta con los certificados
    cd /opt/vmware/vcloud-director/jre/bin
  3. Importar los certificados y listarlos (la fecha de modificación debe ser la fecha de actualización de certificados)
    ./keytool -importkeystore -deststorepass $PASSWORD -destkeypass $PASSWORD -destkeystore certificates.ks -srcstoretype PKCS12 -srckeystore wildcard-http.p12 -srcstorepass $PASSWORD -alias http

    ./keytool -importkeystore -deststorepass $PASSWORD -destkeypass $PASSWORD -destkeystore certificates.ks -srcstoretype PKCS12 -srckeystore wildcard-console.p12 -srcstorepass $PASSWORD -alias consoleproxy

    ./keytool -keystore certificates.ks -storepass $PASSWORD -storetype JCEKS -list
  4. Copiar el archivo certificates.ks a la keystore
    cp /opt/vmware/vcloud-director/jre/bin/certificates.ks /opt/keystore
  5. Configurar la keystore
    /opt/vmware/vcloud-director/bin/configure
  6. Aparecerá el siguiente mensaje. Introducir la siguiente información:
    Please enter the path to the Java keystore containing your SSL certificates and private Keys:
    /opt/keystore
    Please enter the password for the keystore: $PASSWORD
    Please enter the private password for the 'http' SSL certificate: $PASSWORD
    Please enter the private password for the 'consoleproxy' SSL certificate: $PASSWORD

Reinicio del servicio

  1. Iniciar el servicio de vCloud Director y verificar el estado de la celda:

    cd vcloud-director/bin/
    ./cell-management-tool --status
    service vmware-vcd-start
    ./cell-management-tool -u administrator -p $PASSWORD
    ./cell-management-tool --status

    service vmware-vcd status